Showing posts with label World Eater. Show all posts

Tuesday, 26 February 2019

WIP Roboute Guilliman - with NMM Gold Armour


I thought it was time to share my WIP Roboute Guilliman, Seeing now that he is the "Emperor of mankind" he should be wearing his new golden amour.  

I'm still trying to perfect the NMM (non-metalic-metals), I have tried 3 different variations on my Renegade Knights, I thought this style or my 4th would suit Guilliman best.  Your thoughts and comments are most welcome :)


World Eaters Renegade Knight


Death Guard Renegade Knight


Black Legion Renegade Knight (sorry for the rubbish picture)


Monday, 20 January 2014

Lord of Skulls conversion, WIP images.


As promised - this week I give you my Lord of Skulls Conversion, warts and all.  The build isn't completed and has been troublesome, but I am fairly happy so far.  Although it is true that the feet are a little to big and even though both arms have been extended, they still look a little short, plus the head is to small.  But apart from that, I'm fairly happy :)

The main problem I had with this build was not to copy any other conversion I had seen on the web, their are some fantastic conversions out their and great ideas, some easy and effective and some elaborate builds, but I wanted to keep it simple but put my own stamp on it.  Hopefully someone else will like it. 


Side view with the axe trailing behind waiting for the fatal death blow.  As you can see the wrist has been extended by almost 2cm.


Early on in the build, when the legs were coming together it was apparent that he needed something on his back, so I moved the two central exhausts forwards and moulded the tank onto his back so not to look too out of place and bolted on, as an afterthought.


As the right wrist was extended so must the left gun arm, first I cut the lower arm off at the elbow and glued it back straight, hoping it would make it long enough but it wasn't, so I inserted the spare exhausts into the gun, I think they look like cool plasma vents.  I added some additional pipes and wires and hey presto their we have it.


Rear shot, not fully complete and you can see them big feet of his. 


Dynamic falling forward pose :)


So their we have it, I have 6 weeks to paint 30 Zombie cultists a Daemon Prince and my Lord of Skulls, no pressure then.....  If only I could leave my Riptides alone.

Monday, 18 November 2013

Build your own life size GW's 40k Chaos World Eater's helmet part 2


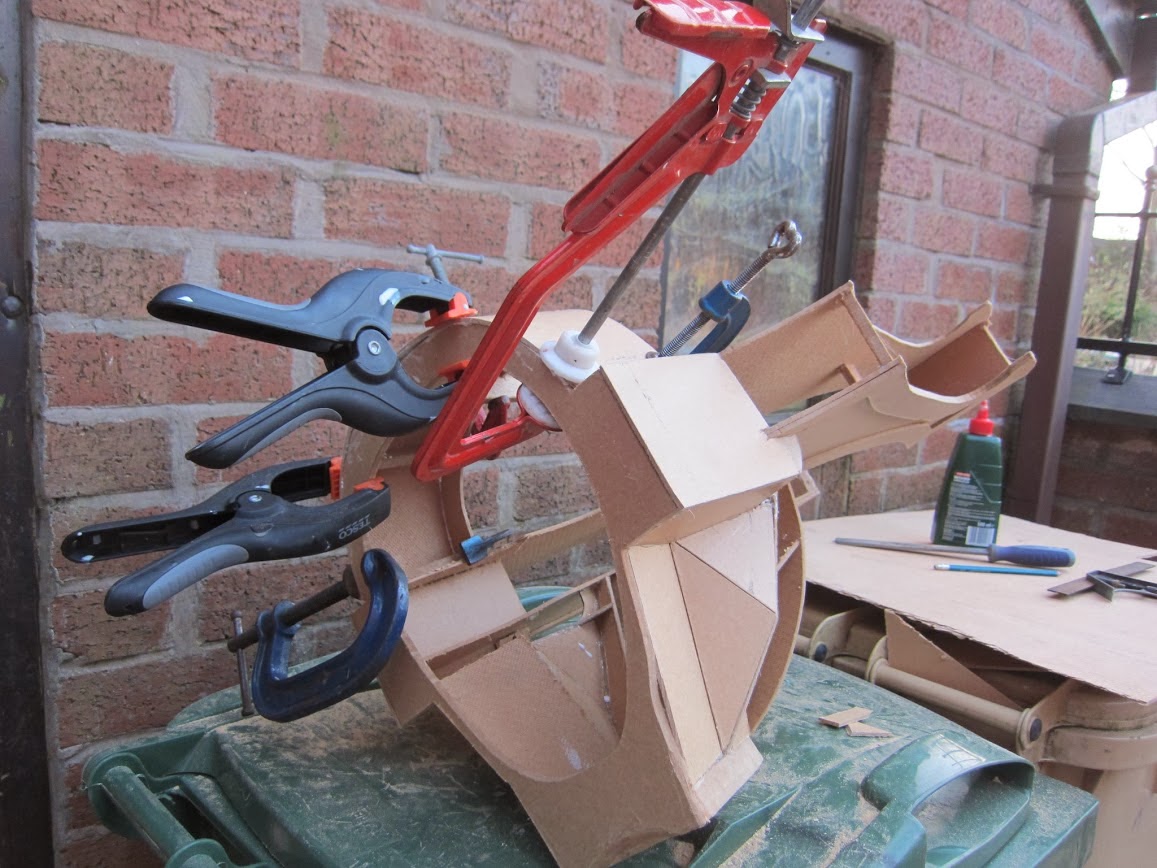
From last post I asked "I will be building up the rounded areas of the helmet and seeing how many clamps I can fit on it?"

And the answer is 6, I didn't even know I had that many clamps, the clamps are holding the the 6mm MDF in place as the Evo-Stik fast drying wood adhesive dries.

Monday, 4 November 2013

Build your own life size GW's 40k Chaos World Eater's helmet part1


Last year I made this helmet for Throne of Skulls with my army list painted on the back, quite a few people commented on how much they liked it. So I though tmay be other people would like to try it with the plans I made, it's not for the faint hearted but it was fun to do. It took a couple of weeks to make and some basic knowledge on using an electric jigsaw, but other then that most people will be able to attempt it, also note that it's a little heavy so cardboard or plasticard could be a suitable replacement and negates the use of a jigsaw.

Below are the 5 x A3 print outs used for the templates for the helmet and I copied/traced them onto 6mm MDF board to cut out, note the blue line is the join for parts 1 and 2.  I glued the parts together with Evo-Stik fast drying wood adhesive because its extremely strong and while this was drying it was held together with dabs of glue from a hot glue gun because it sets in seconds, but watch out for blisters the hot glue gun can be nasty because surprisingly it gets very "hot" I never learned and got hot glue on a blister, getting burnt once is ok but to do it twice in the same place, now that's stupid! 

plan - side view pt 1

plan - side view pt 2

plan - top view

plan - front view pt 1

plan - side view pt 2
Below are the images after the frame work has been glued together, as you can see I used the plans to build up flat plains, edges and batons to make the basic shape extremely strong if a little heavy.  Another thing to mention is; I have a large round head so the plans are a little large but you could always make it smaller or larger, so if you are going to embark on this project make sure your head will fit inside it before you start :)  


basic MDF shell "front"

basic MDF shell "back right side"

basic MDF shell "back"

basic MDF shell "front right side"
Next time I will be building up the rounded areas of the helmet and seeing how many clamps I can fit on it, good luck and enjoy.