Monday, 18 November 2013

Build your own life size GW's 40k Chaos World Eater's helmet part 2


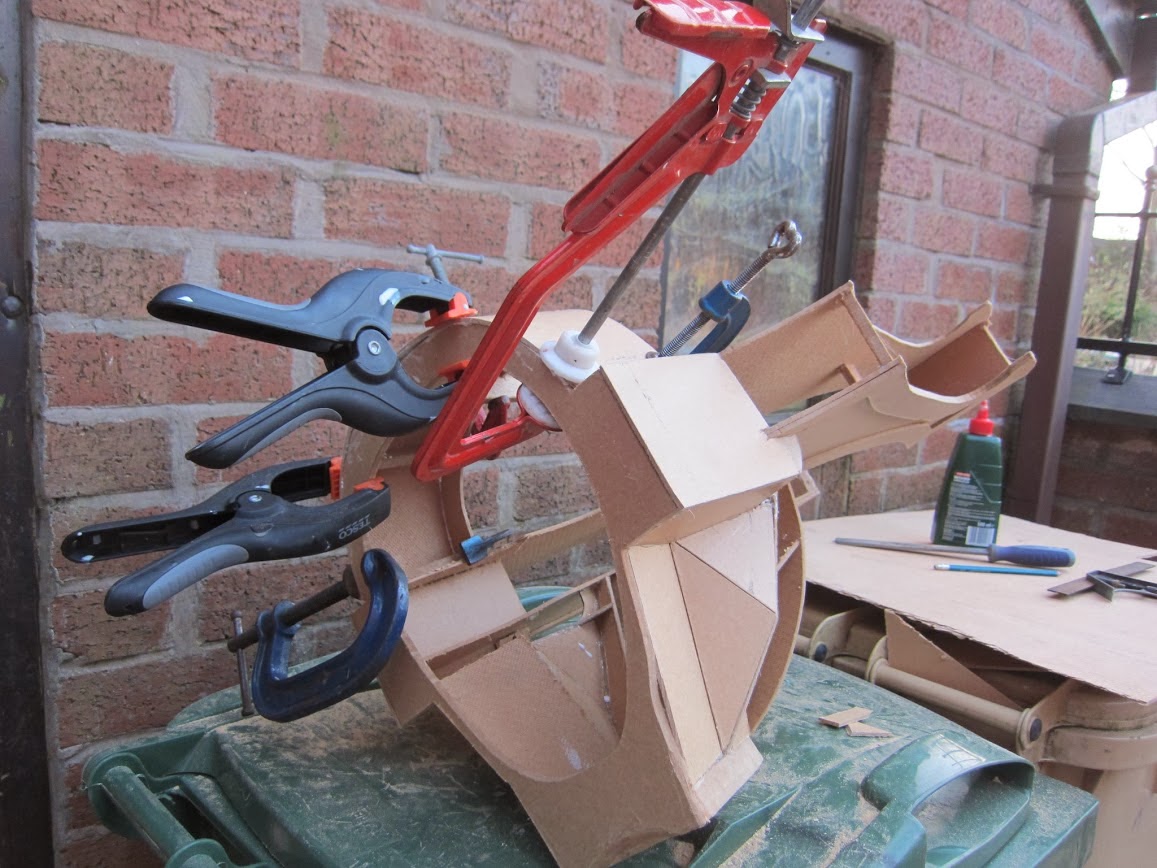
From last post I asked "I will be building up the rounded areas of the helmet and seeing how many clamps I can fit on it?"

And the answer is 6, I didn't even know I had that many clamps, the clamps are holding the the 6mm MDF in place as the Evo-Stik fast drying wood adhesive dries.

Monday, 4 November 2013

Build your own life size GW's 40k Chaos World Eater's helmet part1


Last year I made this helmet for Throne of Skulls with my army list painted on the back, quite a few people commented on how much they liked it. So I though tmay be other people would like to try it with the plans I made, it's not for the faint hearted but it was fun to do. It took a couple of weeks to make and some basic knowledge on using an electric jigsaw, but other then that most people will be able to attempt it, also note that it's a little heavy so cardboard or plasticard could be a suitable replacement and negates the use of a jigsaw.

Below are the 5 x A3 print outs used for the templates for the helmet and I copied/traced them onto 6mm MDF board to cut out, note the blue line is the join for parts 1 and 2.  I glued the parts together with Evo-Stik fast drying wood adhesive because its extremely strong and while this was drying it was held together with dabs of glue from a hot glue gun because it sets in seconds, but watch out for blisters the hot glue gun can be nasty because surprisingly it gets very "hot" I never learned and got hot glue on a blister, getting burnt once is ok but to do it twice in the same place, now that's stupid! 

plan - side view pt 1

plan - side view pt 2

plan - top view

plan - front view pt 1

plan - side view pt 2
Below are the images after the frame work has been glued together, as you can see I used the plans to build up flat plains, edges and batons to make the basic shape extremely strong if a little heavy.  Another thing to mention is; I have a large round head so the plans are a little large but you could always make it smaller or larger, so if you are going to embark on this project make sure your head will fit inside it before you start :)  


basic MDF shell "front"

basic MDF shell "back right side"

basic MDF shell "back"

basic MDF shell "front right side"
Next time I will be building up the rounded areas of the helmet and seeing how many clamps I can fit on it, good luck and enjoy. 

Wednesday, 23 October 2013

My Throne of Skulls Nurgle Army WIP shots Typhus and Heldrake

You have had a blast from the past now for some new and up to date conversions, in preparation for our next trip to Throne Skulls I'll be taking a complete and pure Nurgle Space Marine army with no allies.  Now I know a lot of people take allies to competitive competitions but I'm too much of a purist and I'm so unlucky with dice that I would never win even with a Necron army with the Storm Lord.  I like to turn up with well painted (pretty) themed armies hoping they will be bedazzeled by the army and go easy on me :)

First up is my Conversion of Typhus, It's not much of a conversion but when I bought that Fine Cast model I was a little shocked how small he was I've got Forge World  Terminator Deathguard bigger then him, so I wanted to pimp him up a bit.  First thing was to make him taller, I butchered a Mutilator and cut the bottom of his legs off above the knees and at the hips so I could put typhus in a taller and better pose, I also added mist trails from the Vampire Counts Coven Throne as noxious gas for ever billowing out of his suit, Oh and a pour helpless Imperial Guard Commander who is about to face his doom.


Second is my Heldrake or Hellfly as I like to call it, converted from a Heldrake's wings, a Landspeeder thruster, the air vent from a Storm Raven (which had been left off my Storm Raven as I feel It's too tall, but that's another story for another blog), An Arachnarok complete spider kit apart from one set of legs and flexible power cables purchased from zinge.co.uk  Some serious remodelling of the Arachnarok had to take place to get the model to look like the desired effect, I was looking for a cross between a blowfly and a wasp, I think I achieved it don't you.


Wednesday, 16 October 2013

How to create your own Forge World Landspeeder Tempest Pt- 2

Welcome to part 2 and I have to confess that the plans may not be accurate and may need some tweaking but it will give a general idea of the shape.

The details added represent the love child of the Games Workshop's and the Forge World's Landspeeder, including Gull wing doors and the weapons are incorporated into the fuselage, which have been liberated from my bits box, they include a set of Predator Heavy Weapon side sponsons, two Terminator Cyclone missile launchers and two sets of assault cannons from the Dark Angels Ravenwing accessory pack.

What's not seen in all these images is the vertical fin underneath the engines and the engines themselves, which I used 20mm and 15mm pipes.  Oh... and can you spot the error in all four models, don't copy my mistake and put the spoiler on backwards.

I hope these images are helpful and you enjoy this project, as I said this was my first attempt of creating my own model from plasticard, 7 years on I have learned a lot but it's fun to go back to re-visit your roots and to share.


Monday, 14 October 2013

How to create your own Forge World Landspeeder Tempest Pt- 1

This is a blast from the past, years ago I wanted a squadron of Space Marine Landspeeders for my Crimson First army but I also wanted a Space Marine flyer.  I decided to merge the Forge World Tempest with the standard GamesWorkshop Landspeeder and this was the resulting plans; digitally updated.

The plans are A4 with a scale for printing purposes, with these plans you can get the basic shape and detail can be added later.  For the examples below I used 1mm Plasticard, super glue, precision polystyrene cement and a bit of sanding.

 Stage 1

Stage 2

Stage 3

In my next post we will see what details can be added to bring this basic shape to life.