Showing posts with label Imperial Knight. Show all posts

Wednesday, 2 November 2022

Armies on Parade 2022 part 2 - Chaos knights


My second installment / submission to Armies on Parade 2022.  Just like part one I am using limited scenery.  One thing has become apparent to me when looking at my Chaos Knights, considering they are all sculpted differently and belong to different chaos gods and also painted over many years, how differently they are all painted, I may have to go back and repaint some of them :)

I also forgot to include my Armigers.... Damn.


My latest chaos knight all hale Tzeentch


I made a change to my Black Legion Knight, I've used bits from Be'lakor base. 


Armies on Parade 2022 part 1 - Imperial knights


It has been a while, but here is my first installment / submission to Armies on Parade 2022.  Just to mention it is not my intention to win but only to take part and to show case two of my latest armies I have completed.  Also it is worth noting that the lighting is not great. camera is OK but my skill is mediocre at best :) but I did make a conscious decision to have limited scenery on my board, as the title states 'Armies on Parade' lol.  I hope you enjoy.


Friday, 18 June 2021

Renegade knights Black Legion / Sons of Horus Conversion amendment.


Back in 2019 I converted an Imperial Knight into a Black Legion / Sons of Horus Renegade Knight it took me 18 months to revisit this build to create a close combat alternative and interchangeable weapon option, was the wait worth it? 


Click link to see original post

My first renegade Knight conversion was my Khorne one with two daemonic sculpted claws and I wanted to revisit this still but extend the claws to a giant lightning claw style, where to start.  Luckily my son had started his Tyranid army and we had some spare giant scything talons and I also asked friends, Dwez and Otty if they could help, and they did.  You definitely need friends when it comes to conversions and never throw anything away ;) 


I added plasticard to the sided of the bladed talons to give it a mechanical look rather than an organic look and converted the Imperial edging with green stuff and plasticard.  I added 8 spikes cut from spru and a chaos shield, and some guitar strings and hey presto there you go.


Tuesday, 30 June 2020

Imperial Knights painted with the aid of an airbrush - kind of


Dave or better known as Dwez from 40kaddicts sent me a text saying take a look at this on Twitter and you should put your stuff on; the twit said "Hear ye, hear ye! A grand galactic knightly tournament declared in ye old Emperor’s name. Share your loyal and heretic Knights with us!"
So I put my Chaos Knights on and I got some nice positive re-twittes and comments.  Then I realised I hadn't photographed or blogged about my new loyalist Knights, so hear goes.


Following on from the strange and mixed response from my post on my 
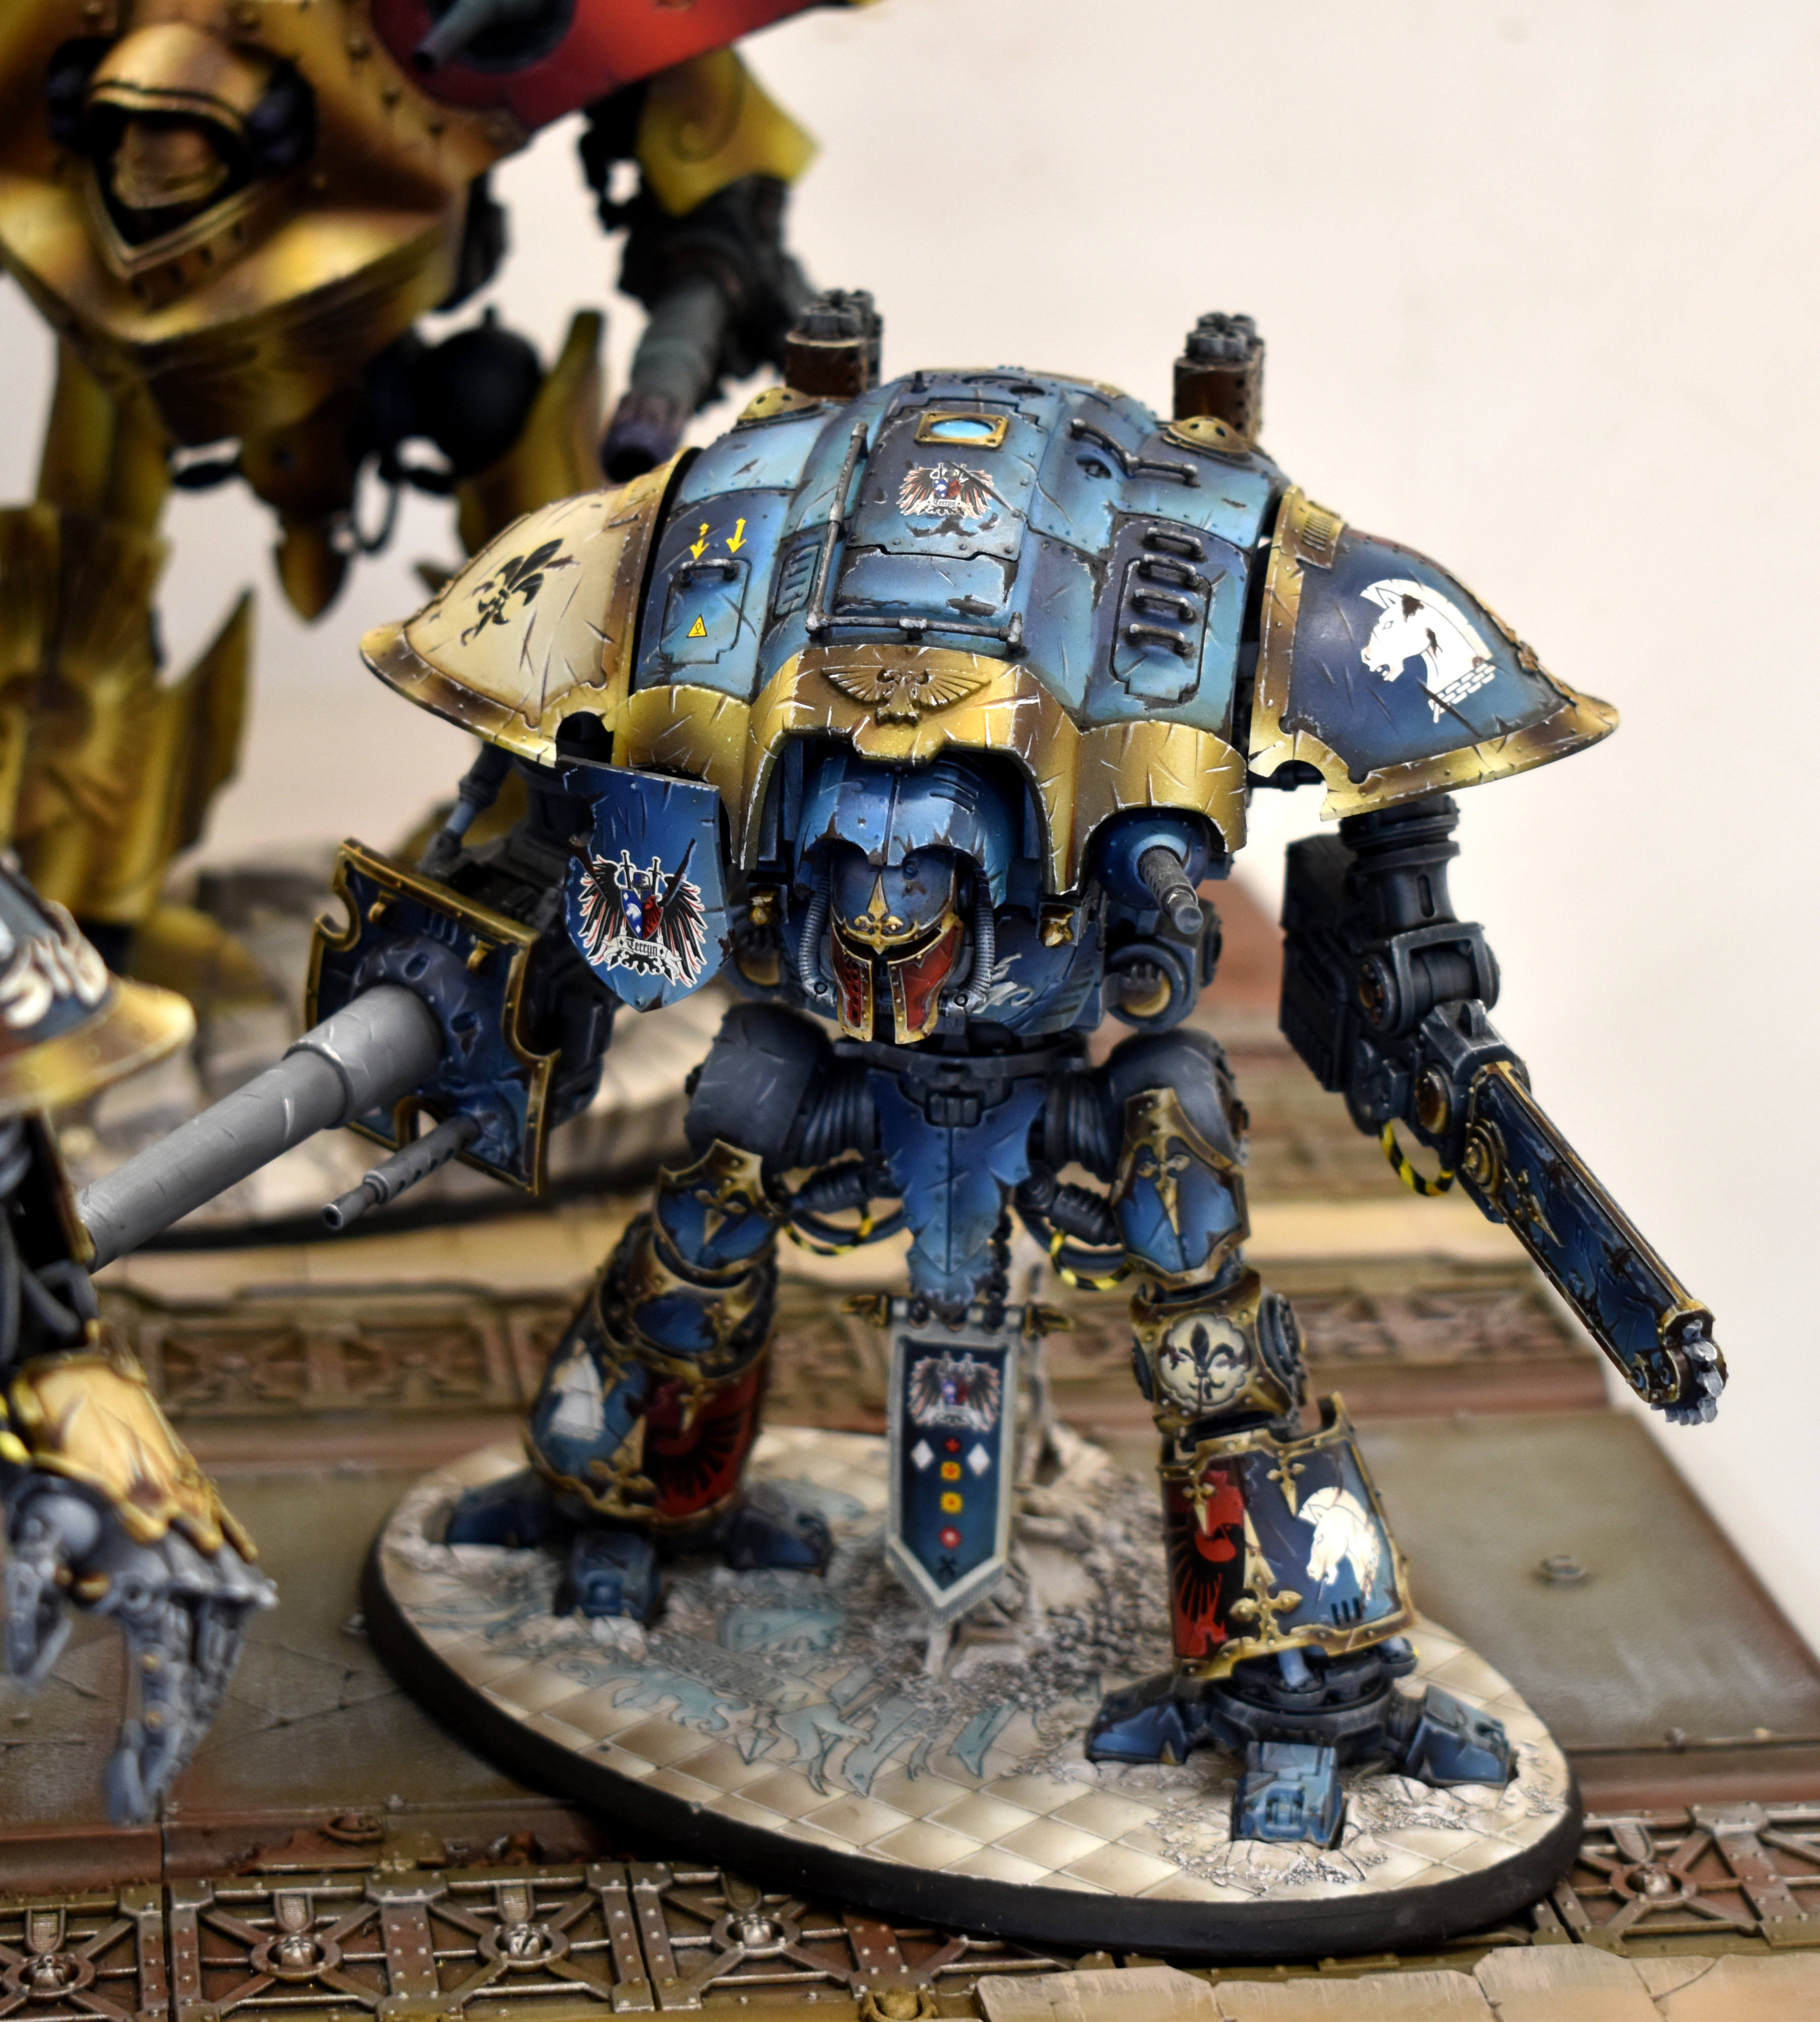
"Project: Custodes Castellan Knight" I had decided to paint my Imperial knights using my airbrush.  I still consider myself to be a novice at airbrushing but I felt confident enough after painting my Castellan.  I had already painted the blue armour on them all, and I had finished my warlord, but I wasn't happy with the gold trim which was hand painted. as you can see below, the airbrush gold on the Castellan looks better, in my opinion.


I stripped the armour off him and dug out all the other armoured bits from my other Knights and started to mask up.


This is a long and laborious process, and adding cleaning the airbrush every blink of an eye, it can put people off airbrushing.  But the results speak for them selves, it's not quicker, it's just an alternative method of painting.   


Then following my technique I used on the Castellan I began to airbrush away with no idea how hey would turn out as it is all masked off.


I revealed one first to see if I liked the effect, and I did, phew.


It all looks a little too clean and tidy so it needs a lot of weathering.


OK so far so good, but now they needed basing and I wanted a theme base for all five but I didn't want the bases for my three un-based ones to over shadow the first two.  I decided to use the same Aquila and add some building wall sections and rubble, hoping it would work together.


You can also see I have some 10cm bases in the shot too, they are from my Armiger Helverins which I still haven't finished oops.  I airbrushed the bases just in the same style as  my Warlord and Castellan and here is the results of many months of work.


And as a passing shot this is my full collection of Knights and stuff I hope you enjoy :)


Sunday, 29 September 2019

Project: Custodes Castellan Knight - Concept through to design pt2


Love it or hate it, my design for a Custodes Castellan Knight has had a mixed response, but enough of that, you have waited a long time for part 2 so lets dive in.  


I used the original shin armour from the Castellan and added 3mm plasticard to the sides and bottom and 1 mm plasticard as a guide to the front.  Once I placed the front  guide on a I placed more 3mm plasticard to the top but I forgot to take a photo.  


Now I had the desired skeleton structure I used car body filler to blend all the elements together, and sanded the filler to get a smooth finish.


I used the Legio Custodes Telemon Heavy Dreadnought as a guide for the leg armour.


Before I extended the legs I would need to create a base and feet to make sure everything fits together.  I used the broken Aquila from the Honoured Imperium scenery kit, and sculpted extra sections and extra cracks underneath the feet with Milliput.  You can also see I have changed the toes of the feet too.


I know it is hard to see in this image, but you can just see the extra plasticard I inserted into the legs to make them longer.


I used 1mm plasticard for the Aquila symbols on the leg armour and a Dremil to carve out the swirls on the other sections of the armour.  Just like the Shin guards I used the original armour and added plasticard and body filler to get the shape I needed for the thigh and arm armour.


Next time I will show you how I airbrushed it :)


Thursday, 11 July 2019

Project: Custodes Castellan Knight - Concept through to design pt1


Love it or hate it, my design for a Custodes Castellan Knight has had a mixed response, so much so that I feel the need to justify my decision making.  But first I would just like to clarify what the original concept was.  The Custodes Knight is a relic from the past, manufactured on Terra and a prototype to the current Imperial knights.  With this as my mantra, I did not need to stick to the original design by GameWorkshop.  I was free to model it on the Custodes aesthetic.  


As most of you will be aware my design is based on the Forge World's Legio Custodes Telemon Heavy Dreadnought and I have to say is probably one of my favourite designs for 40K EVER!  Speaking of which I couldn't mention the Telemon with out mentioning the Mondoshawan from the film Fifth Element, in my opinion one of the top 10 Sci Fi films of all time, the Mondoshawan had such a unique design and akin to my next contender.  The original terminator in the early days of 40K,  mkI Tactical Dreadnought Armour, I remember queuing 40 deep outside GamesWorkhop Liverpool for an hour waiting for the shop to open to buy this bad boy, it is currently sitting in my mate Otty's bit box of things to do :)

Images owned by Games Workshop, ForgeWorld and the film Fifth Element 

Ok so we have my mantra of 'Custodes looking' and my influences of 'gold and flamboyant shoulder pads' the next part would be tricky to get the design to fit around the basic shell of the Castellan while fitting all the guns in.  So for once I actually sketched out some preliminary designs on scrap paper.


I really liked my second design because it's almost a complete copy of eh Telemon, but I didn't think the Siegebreaker cannons would fit, the shoulder joints would be in the way.  I decided to reduce the overall mass of the pouldrons and house the gun higher up.  It only just fit there to be honest, if I wanted to use both Siegebreaker barrels either side I would have had to make the pouldrons even bigger.  I think that would have made the Knight too top heavy so I had to settle for a single barrel in the end, which I think was a compromise I was not happy with.


I did some slicing and dicing to get the ideal design of head for my knight.


I fleshed out the chest plate with Plasticard


Kit basing a Shieldbreaker missile housing from a whirlwind kit.


I used plasticard to form the basic structure of the pouldrons.


Then a glued more plasticard to strengthen the structure.  I couldn't find my mini clamps so clothes pegs did just as good a job :)


Testing to see if they fitted.


I little bit of body filler and a lot of sanding, followed by more plasticard I had my basic top half completed.